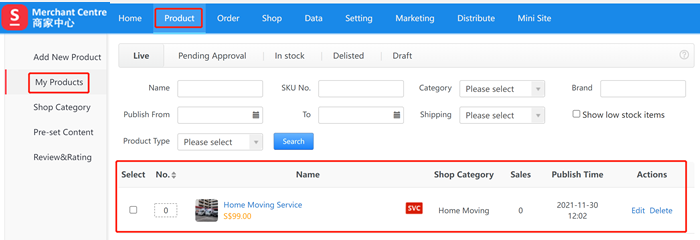
Click "Add New Product ", select the product/service category, and click next. (This category is the category you chose when you joined as seller. If you need to change or add a category, please click "Shop-Category Management-Apply for a New Category", and it can be used after the platform is approved)

Several things to note include:
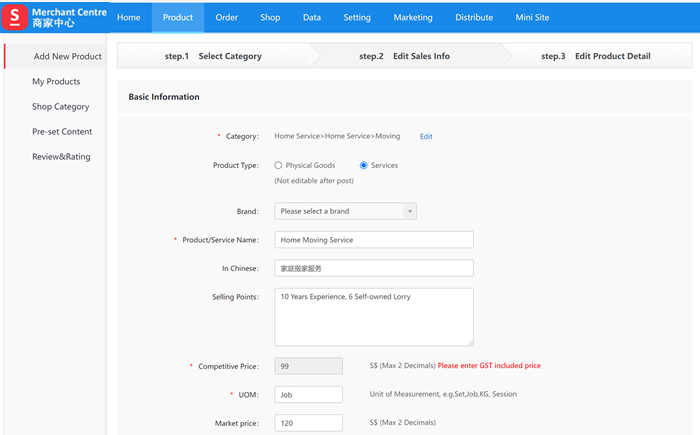
1) The product type defaults to "professional services" (if you publish physical products that involve logistics and distribution, please select "physical products");
2) the listing price must be set to be competitive price to attract users to place orders online;
3) Inventory/stock, if the above price is limited, you can set a quantity limit, so customers will not be able to place an order when this quantity is reached, otherwise please keep the default 9999;
4) Shop category refers to the secondary category for your own shop. For example, the service category you choose is moving service. You can further categorize it into "office moving", "factory moving", "family moving" and other shop categories to facilitate your customers' browsing. You can modify it in "Product-Shop Category";
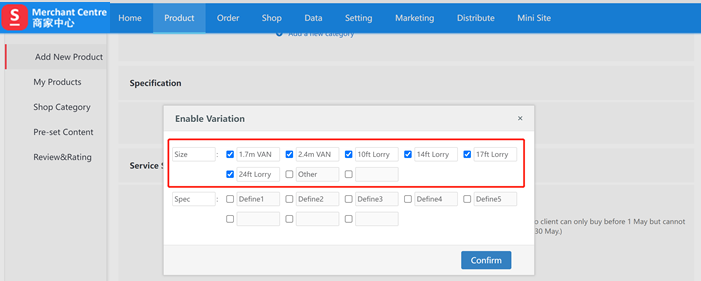
"Enable Variation" is a very important feature that allows you to enter different prices according to different service conditions. Taking moving service as an example, you can set different prices for a 10-foot/14-foot/20-foot truck so that customers can directly choose a model from the front end page and pay the corresponding price; another example is piano training services, you can target children/adults/elderly and set different prices. Take the following picture as an example. You can directly modify the text after you tick the corresponding items in the pop-up window as needed, and only the content you tick will be displayed on the front page.
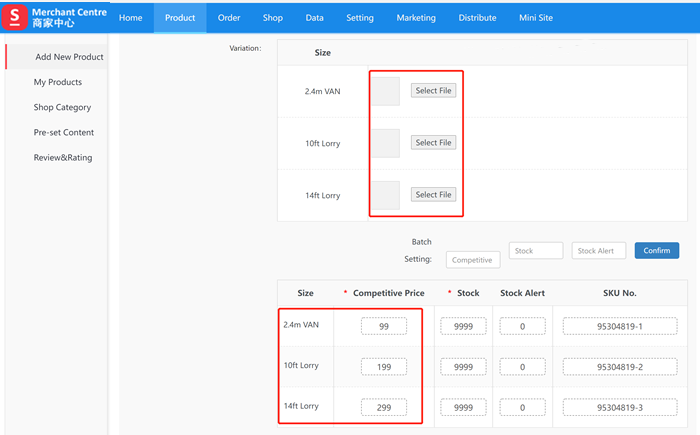
According to the variation/specification you set on the previous step, you can set different pictures and prices for each of the variation/specification.
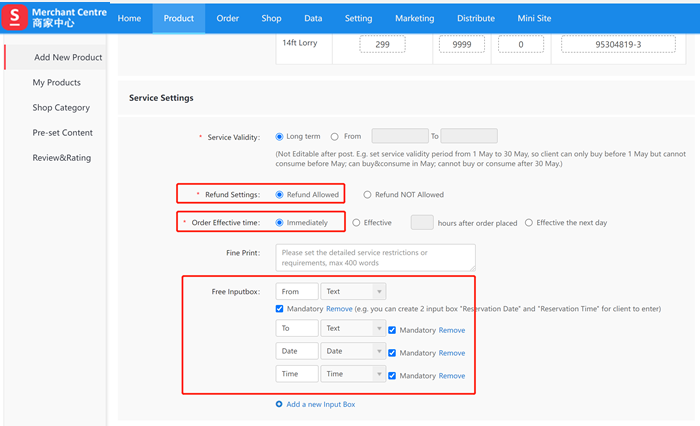
If the service you upload requires users to provide relevant booking information, you can add fields and input requirements by yourself. Take moving service as an example. You can set fields here to require users to input "moving out address, moving in address, moving date and time etc.” when placing an order, so you don’t need to contact users offline to ask for such information, and realize 24/7 automated order acceptance. Of course, if the customer’s expected appointment time period is full, you can contact the customer to change of time.
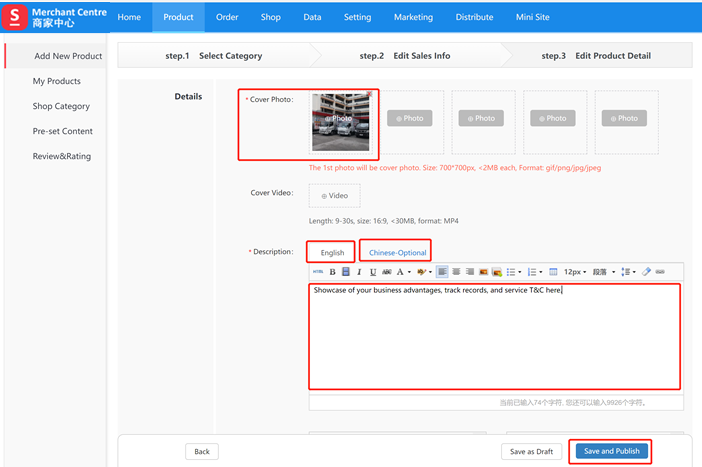
Choose at least one picture as the main picture for the service to be uploaded. It is recommended to upload multiple pictures to make it more attractive. In the product description section below, enter the specific introduction of the service, please try to publish the introduction information with pictures and texts, so that users can understand the details of the service more comprehensively, so that they can place orders online with more confidence. After all editing is completed, you can "publish the product". Please note that in order to control the information quality of the services, we may need to review the content before being published.
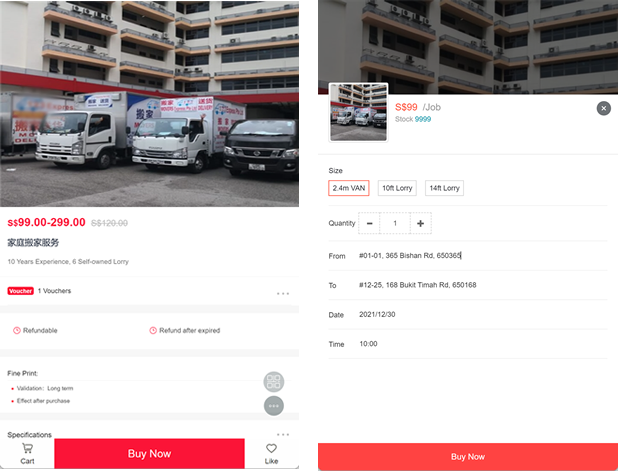
The title, picture, price, specifications and other information you enter will be displayed at the front end for customers to view and purchase.
If you need to update the services that have been released, you can do it under the "Product-My Product" directory.
